Importing Bank Data |

|

|
|
Importing Bank Data |

|

|
Importing Bank Data
In this section, you will learn:
•How to import data from your bank into Bank Reconciliation
Required
Before continuing, you must:
1. Have data from your bank in a file or multiple files in tabular format.
2. Be working in the proper account.
Overview
Obtain a copy of your bank transactions in a usable file format - Excel spreadsheet, comma-separated values (CSV), tab-delimited, etc).
Every bank uses its own format to order the data fields. Fortunately, Bank Reconciliation will handle any source file as long as it is in a tabular format.
Steps To Import Data
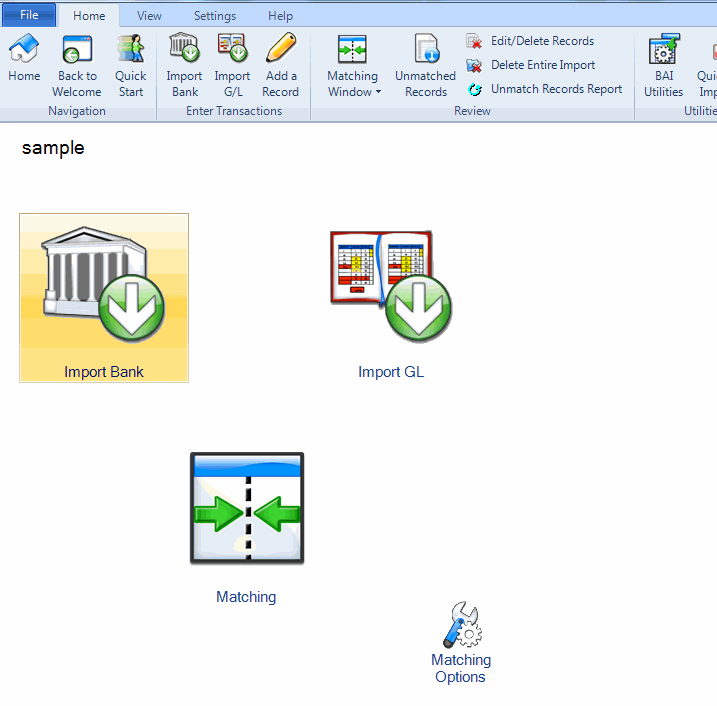
1. From the Home Screen, click the Import Bank button.

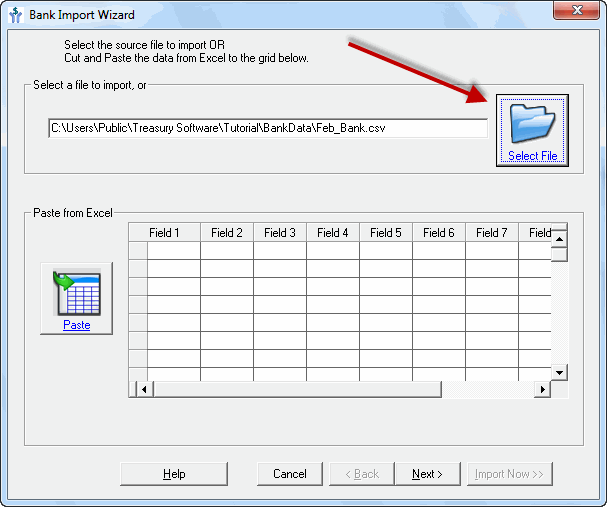
This will load the Bank Import Wizard (Figure 2 below).

2. In the wizard, you can either:
•Browse to a saved file by clicking the folder icon (circled in red in Figure 2 above)
•Copy data from Excel and paste it into the grid a the bottom of the screen.
Note: It is best practice to import a saved file.
When finished, click Next.
a.If the file was an Access database:
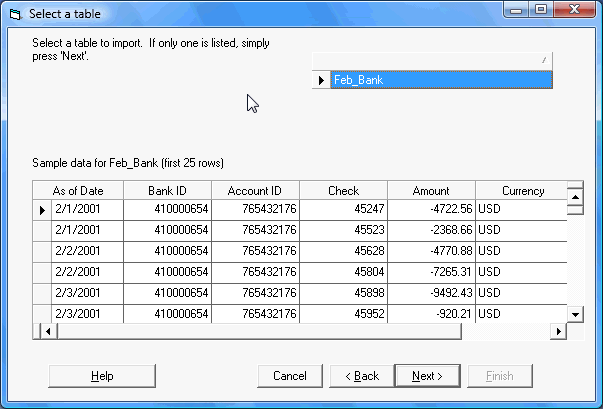
The Select a Table dialog box (Figure 3 below) is displayed.
b.If the file was a multi-sheet Excel spreadsheet
The "Select a worksheet or range" dialog box would be displayed.
Choose the proper table or sheet and click Next.

Figure 3- Select a Table dialog box
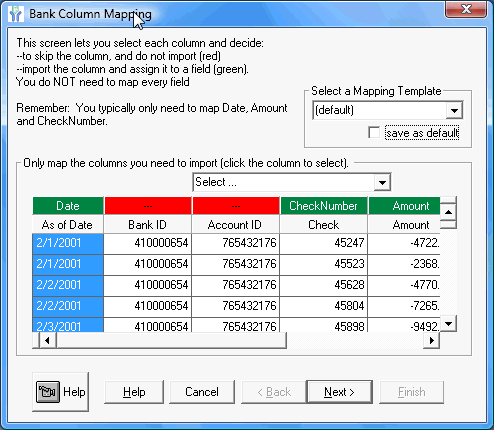
You will now be at the Bank Column Mapping dialog box (Figure 4 below).

Figure 4 - Bank Column Mapping dialog box
At this point the import process is not yet complete. The data which has been brought into Bank Reconciliation must be mapped to identify each field to Bank Reconciliation.
Note: The data only needs to be mapped once. Bank Reconciliation automatically remembers your settings.
Next Step