Import Data
Obtaining Import Data
Before importing transaction files into ACH Universal, they must be obtained from your accounting package. The exact process depends on the package, but in general you will run an appropriate report for a given date range and then export this report to an Excel spreadsheet or CSV file. For more information or assistance in this, contact your corporate IT.
Importing Transactions
Click on Import Transactions from the icon in the center of the homepage.
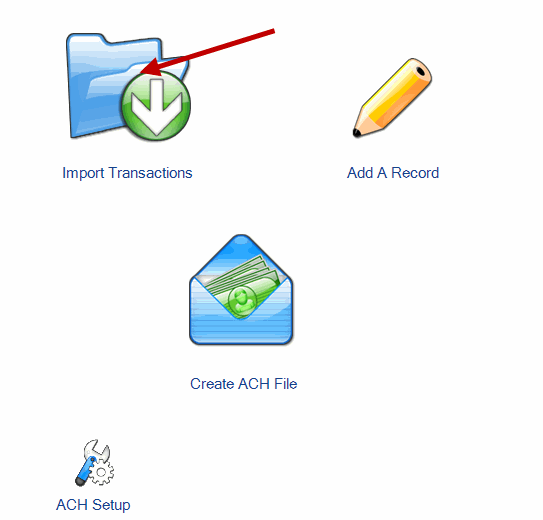
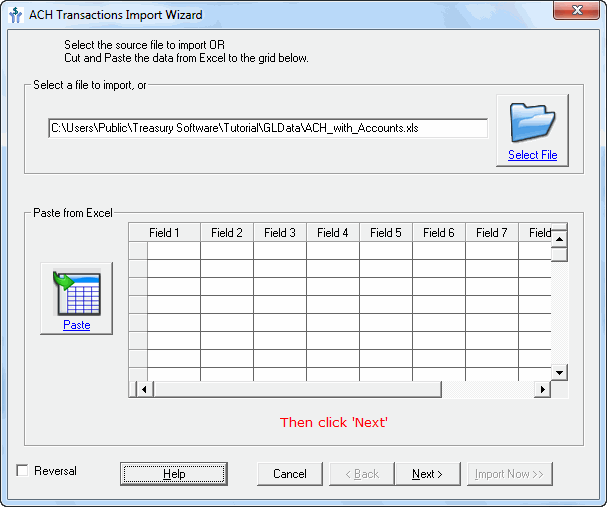
Click the Open Folder Icon on the General Ledger Import Wizard.
Select your file to Import and click Open. Common file types are Excel (.xlsx, .xls), Comma Delimited (.csv or .txt) and tab delimited (.txt). In addition, fixed width text imports are available for manual imports.
Click Next.
Mapping
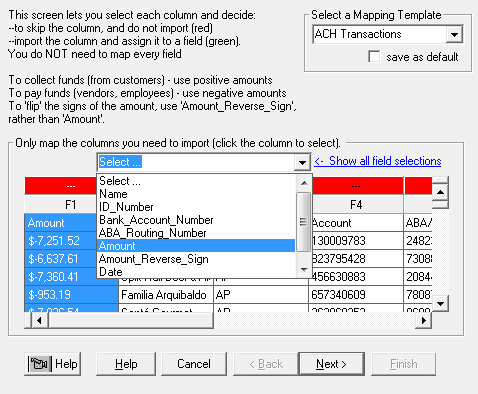
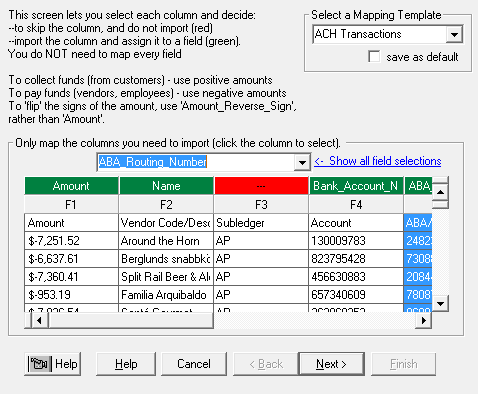
The Column Mapping screen allows the user to tell the File Formatter what information is in each column on the import file. Simply Highlight a column, and select the appropriate column mapping from the drop down for the data.
After selecting the Column Mapping, the section about the column names (F1, F2, F3, etc) will switch from Red to Green and list the selected mapping.
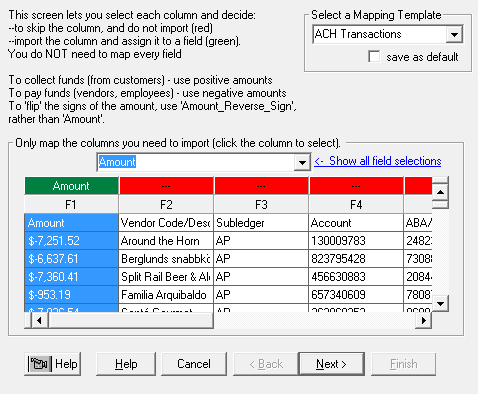
Repeat this for all required columns. The required fields are Amount or Amount_Reverse_Sign, Bank_Account_Number, ABA_Routing_Number, and Name. When all the necessary columns are mapped, click next to continue the Import Wizard.
Pay, don't collect your payroll - use Amount_Reverse_Sign when needed
Negative amounts decrease your balance, and represent payments out to employees and vendors.
Positive amounts increase your balance, and typically represent collections from customers and others.
If the Excel or other file that you are importing is displaying the amounts in positive format, and the transactions represent payments out - then map the field as Amount_Reverse_Sign. This has the effect of multiplying the amount by a negative 1.
Review Records
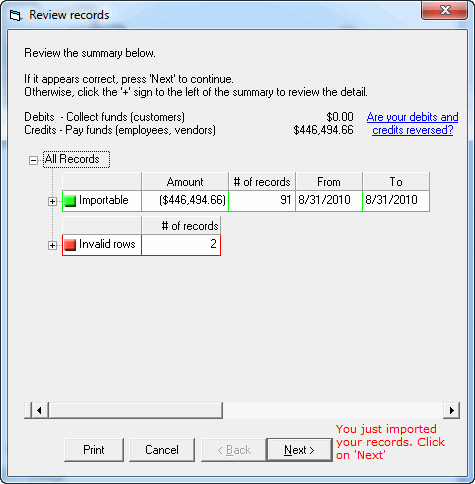
This screen will display a list of the importable rows and invalid rows. To review the list of Importable Records, click on the “+” sign as shown below.
If the “Amount” and “# of Records” columns are correct, click Next and go to Finish.
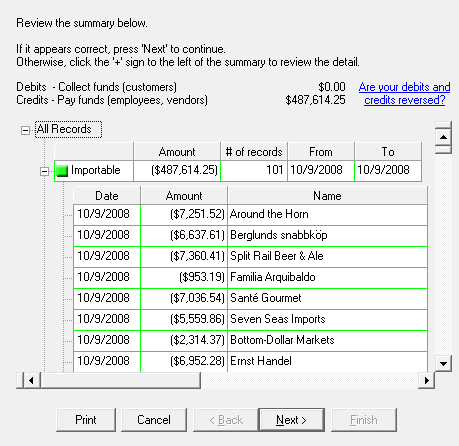
The grid will display the importable transactions and the basic information.
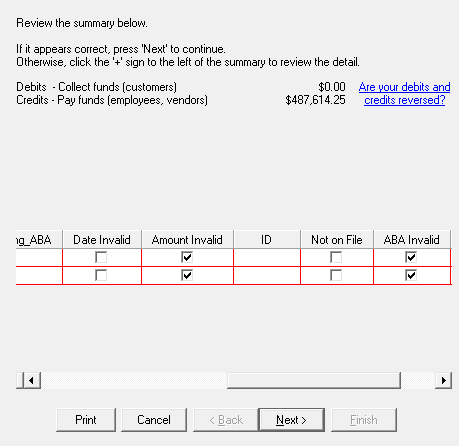
The Invalid Rows section will list all rows that will not be imported into ACH Universal. The software will automatically mark Header rows, footer rows, summation lines, and blank lines as invalid. For each row that is invalid, a check mark will be placed in the appropriate column indicating why the row was invalid. In this case, the records were Invalid because the system detected that one was a summary row and the other was a header row. This caused both Amount and the ABA number to be invalid.
Once you have verified the importable information is accurate, click Next. If you wish to Cancel the import process and try again, simply hit Cancel.
Click Finish to complete the Import Wizard.

Next Step
You are now ready to create and transmit your ACH file.
Next: Create and transmit ACH file >>
