Creating ACH Files |

|

|

|
|
Creating ACH Files |

|

|

|
|
|
||
Once you have completed your setup, you can create ACH files.
Tip: Need to just send a test file now?
1. Change your 'From' and 'To' dates to historical/old transactions which you have already fulfilled. You can then send that ACH file up to your bank for testing.
2. Just starting out and don't have any historical data?
See our utilities tab to create a pre-note file.
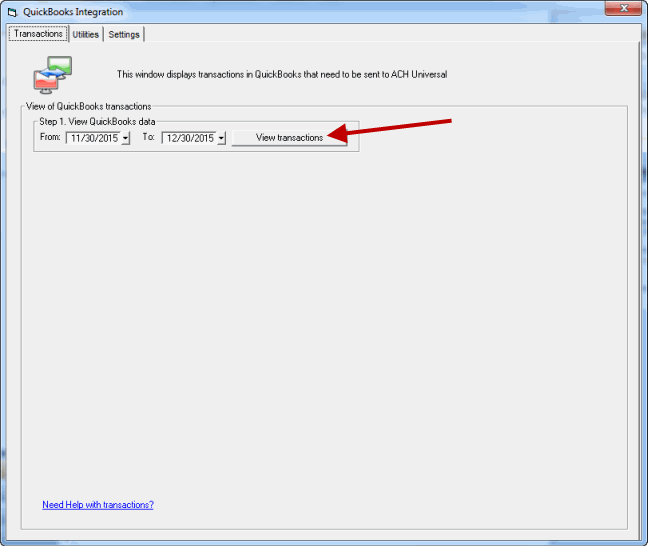
Step 1. Adjust dates, if needed, and then click on the 'View transactions' button.
This will display all available records.
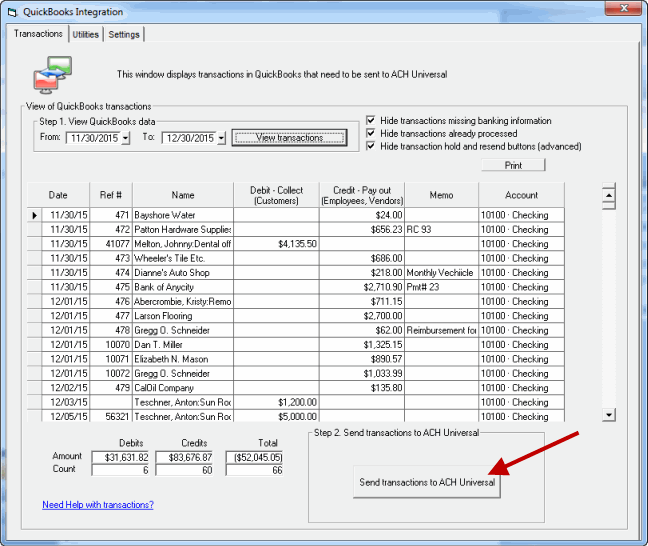
If you need to hold or resend a transaction, see our advanced options features.

2.After reviewing the records, click the 'Send to ACH Universal' button.

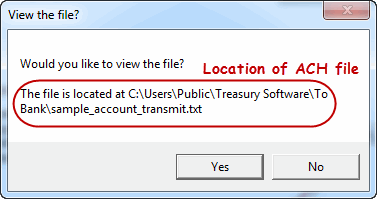
Congratulations - Note the location of the ACH file.
The file will always be saved at this location.
Want to change the location, or see archived ACH files? Go to our creation page.

Transmission
Once the file is created at your location, it must be transmitted up to your bank to be fulfilled.
Otherwise, it's like writing a check, but not mailing the check.
Next step - Transmitting the ACH file