Database Archiving |

|

|

|
|
Database Archiving |

|

|

|
|
|
||
Database Archiving
Archiving is used to move older records from your main account database to a separate archive database. This offers improved speed and efficiency in working with the main database. The archived records are still accessible through ACH Universal for reports as needed. Archived records can also be restored to the main database should the need arise.
Before archiving records, you must create an account to hold the archive. The archive account name should match its main counterpart with "_archive" appended to the name. For example, the archive account for an account "Payroll" should be "Payroll_archive." See Creating An Account for steps in this process.
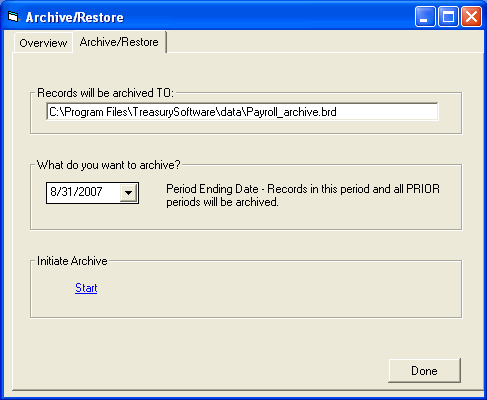
Select File from the main menu, then Archive/Restore. Click the Archive/Restore tab. You will see Figure 1 (below).

The textbox shows that the archived records will be stored in Payroll_archive.brd. All records up to 8/31/2007 will be archived. All records after that date will remain in the current account database (in this case, Payroll).
When the settings are correct, click Start. A prompt will appear containing the number of records to be archived. Click Yes to archive the records, No to cancel.
When the archive is finished, click OK on the confirmation box. Click Done.
Restoring Archived Records
Follow these steps to restore archived records to the main database.
Select File from the main menu, then Open/Select Account.
Select the archive database (ends in "_archive").
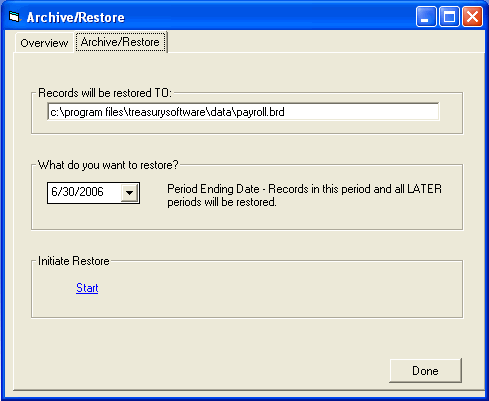
Select File from the main menu, then Archive/Restore. Select the Archive/Restore tab. You will see Figure 2 (below).

Figure 2 - Restore
The textbox will show the main account database name (in this case, Payroll). Select the beginning restore date. All records more recent then this date will be restored to the main database.
When the settings are correct, click Start.
Click Yes to confirm the restore or No to cancel. A message will be displayed confirming the restore has been completed. Click OK.
Click Done.