Direct Deposit |

|

|

|
|
Direct Deposit |

|

|

|
|
|
||
Direct Deposit with QuickBooks Integration:
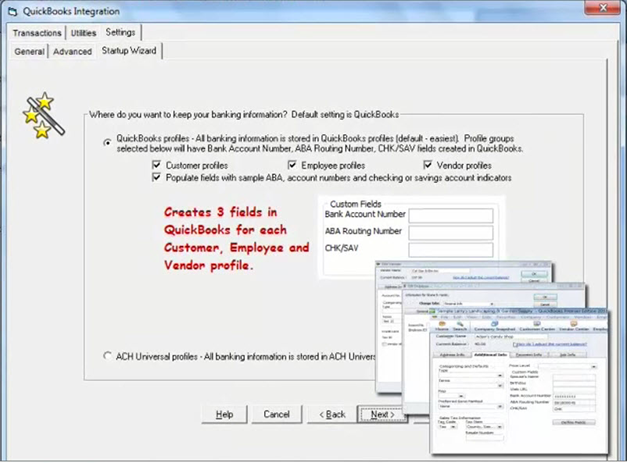
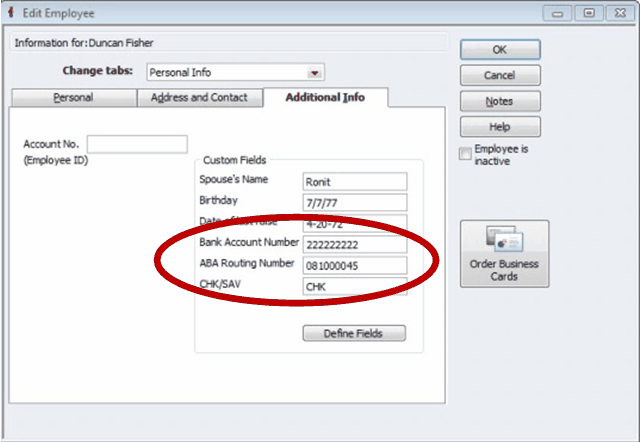
During the initial Integration set up, three fields are automatically created in each employee’s profile. These fields are Bank Account number, ABA / Routing number, & Checking or Savings field.
When these fields are filled, ACH Universal knows the employee is to be paid by Direct Deposit, rather than by check. Once banking information is complete for all employees paid by direct deposit, you’ll be ready to run your first payroll. Payrolls containing both direct deposit and check payments can be processed with one of two methods:
1.Method one is to run a single payroll. If you’re already running payroll this way, your current process won’t change. However, checks will be printed for all employees - both those paid by Direct Deposit as well as those paid by check. This means the checks printed for employees on Direct Deposit must be destroyed.
2.Method two is to run two payrolls – one for the employees paid by Direct Deposit and one for those paid by check. We highly recommend using this method, first because you won’t need to destroy checks and second because it creates a clearer audit trail. While this option requires some initial set up, QuickBooks Scheduled Payroll feature makes it easy. You simply separate employees into two groups according to how they are paid – one group for those getting checks and one group for those paid by Direct Deposit - and run payroll for both.
If you want to use Method Two and simplify your payroll we’ll help you set up your groups quickly and easily using Scheduled Payments.
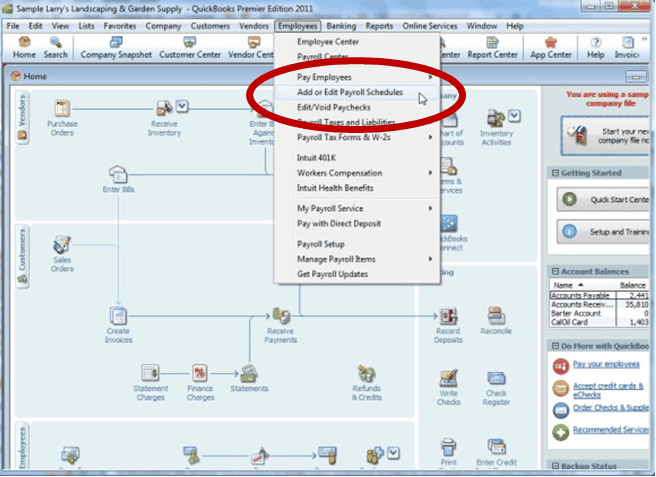
To create a scheduled payroll group, from QuickBooks main menu select: Employee > Add or Edit Payroll Schedules.
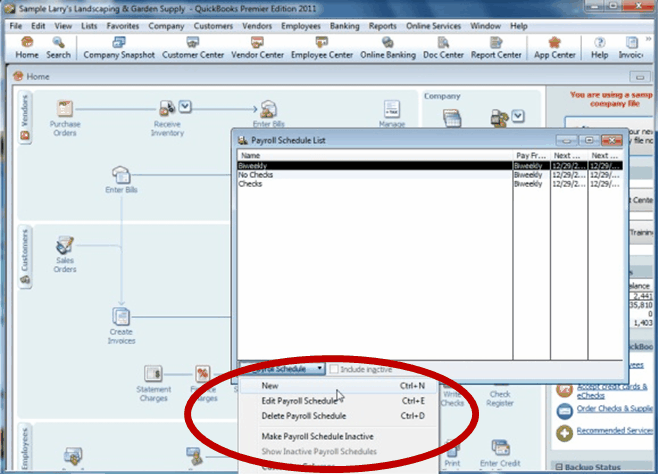
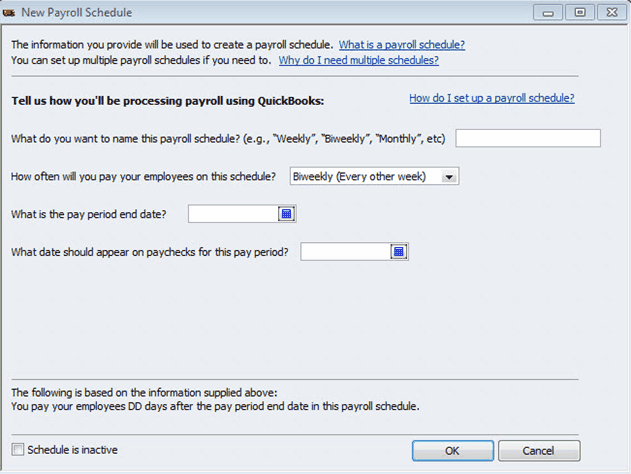
On the Payroll Schedule List screen, select: Payroll Schedule > New. We will call our group No Checks- but you can choose any name. Select your payroll frequency, enter the next period end date and payroll date, then Okay to finish. Repeat this process to create a second group called Print Checks for the employees receiving checks.
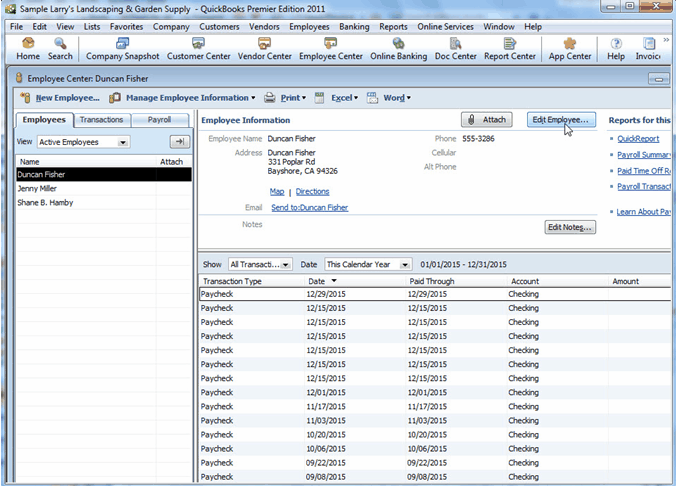
Next assign each employee to a group. Select Employee Center and Edit Employee.
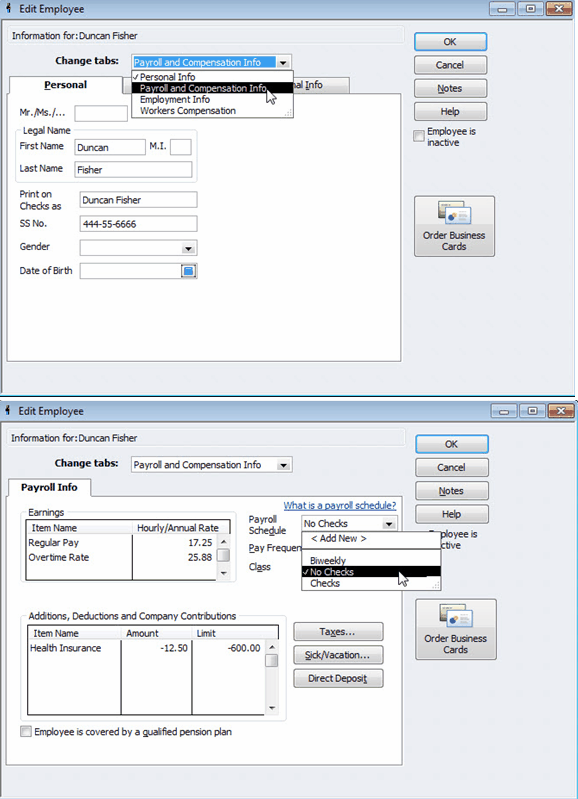
From the Change tabs drop down, select: Payroll and Compensation Info. This employee signed up for direct deposit, so we’ll select No Checks in the payroll schedule drop down
Repeat this process to assign each employee to a group according to how they’ll be paid. As a reminder, our custom banking fields were created here on the Additional Information tab. ACH Universal uses the information in these fields to create your ACH Direct Deposit file. If an employee’s Bank Account and ABA Routing number haven’t been entered, a transaction will not be created.
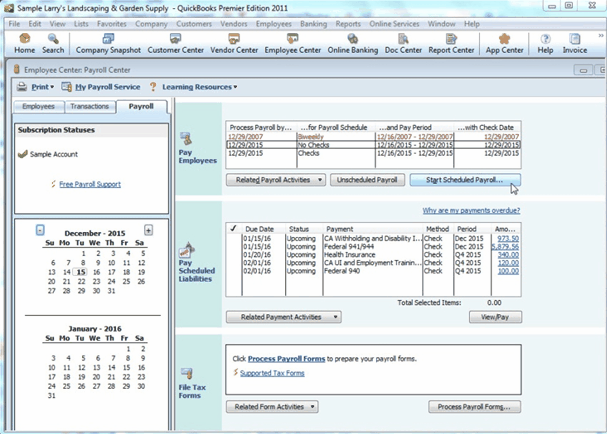
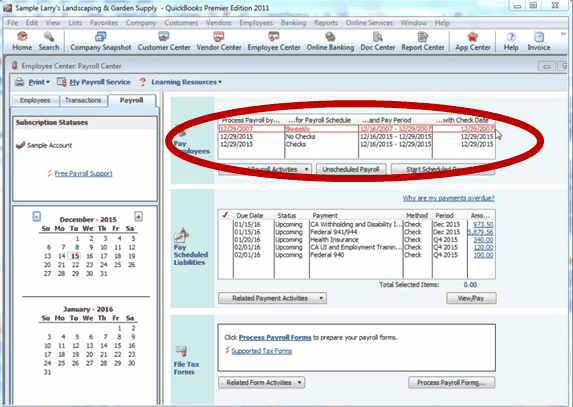
Now we’re ready to process our payroll. If you’re processing a single payroll and haven’t divided your employees into groups, at this point you’ll process your payroll as you normally would. If you’re processing payroll for two groups, from the main menu select Employees > Pay Employees > Scheduled Payroll.
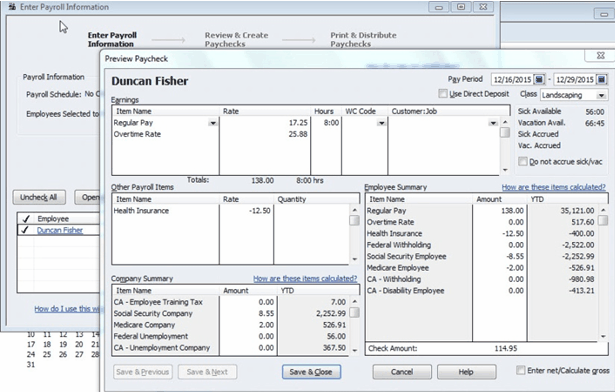
First select the No Checks group. Enter hours, or update the payroll as you would during any normal payroll process.
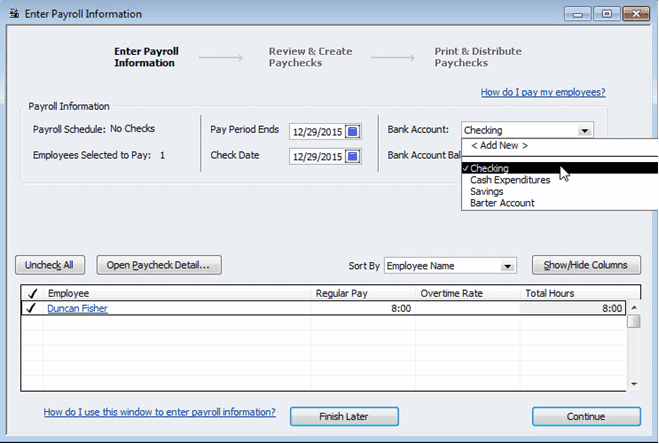
From the Bank Account drop down confirm that the checking account, selected during Integration set up, is the default account.
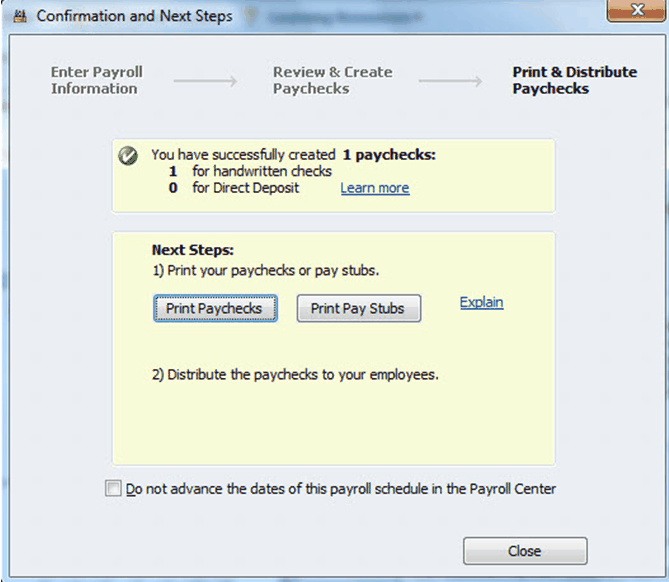
On the next screen change the Paycheck Option from Print paychecks from QuickBooks to Assign check numbers to handwritten checks. While the check number field can contain more characters – keep it simple and enter DD, for Direct Deposit.
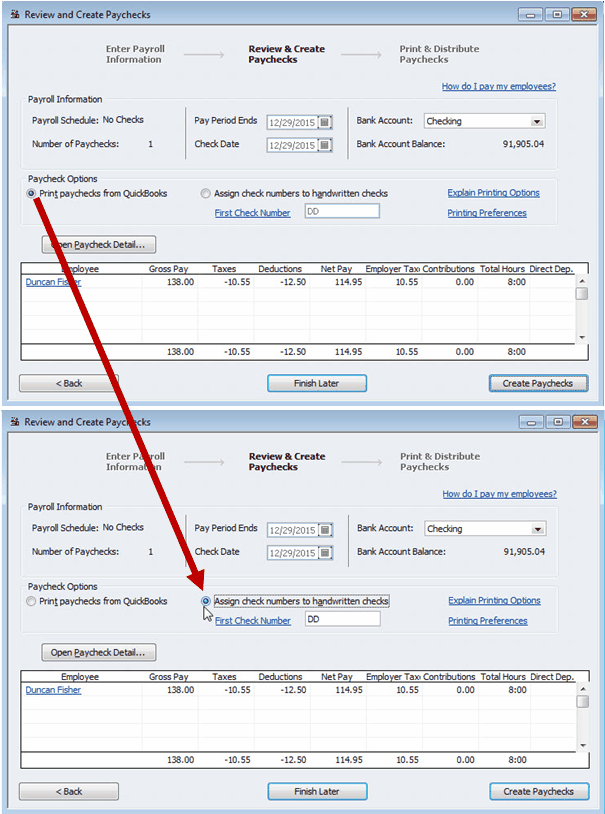
As a reminder: perhaps the single most important detail to remember when processing payroll is to always, always be sure Assign Check Numbers is selected when running direct deposit. Note also the Net Pay total. You’ll use this as a control total to confirm your direct deposit.
To process payroll for the paper check group, follow the same steps with two exceptions: First, set the print option to Print checks from within QuickBooks, and Second, select to print paper checks, not pay stubs.
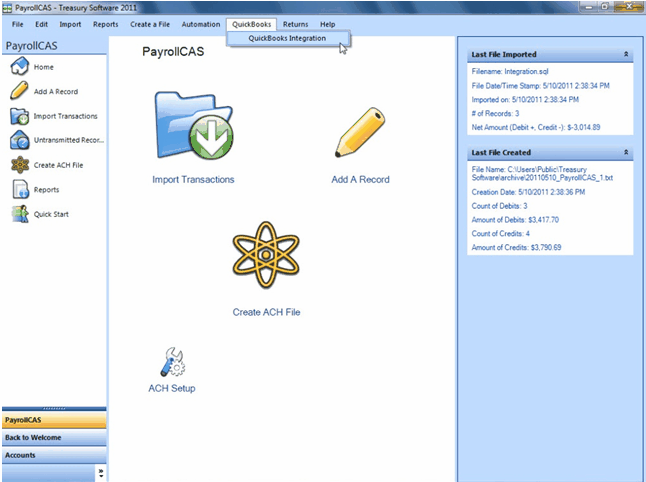
Go to ACH Universal. From the main menu select QuickBooks > QuickBooks Integration.
Filter the dates if needed, then select View transactions. Only the direct deposit payroll transactions should appear in the window.
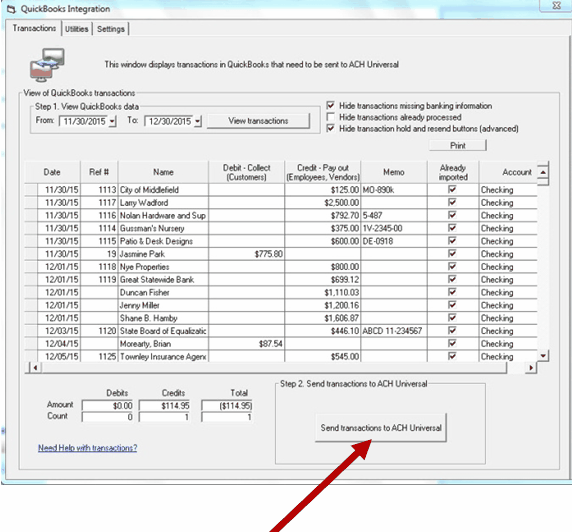
Confirm the totals and count – and then Send to ACH Universal to create your ACH file. We can view the file if we want to check it one last time – and when done, transmit it to your bank as you would any other ACH file.